Understanding and Implementing Linked Lists in JavaScript With ES6 (part 2)

This is a continuation of a previous piece where we digested all surrounding concepts, pros and cons, Big O time complexity, real use cases, linked-list mainly operations, and all that kind of theory. If you have not read it yet, I recommend you read it first.
This series is about data structure implementation in JavaScript using the ES6 specification.
The aim of this second piece is to walk through the implementation of a linked list. Actually, the two pieces enclose a linked list itself since the prior piece is pointing to this one.
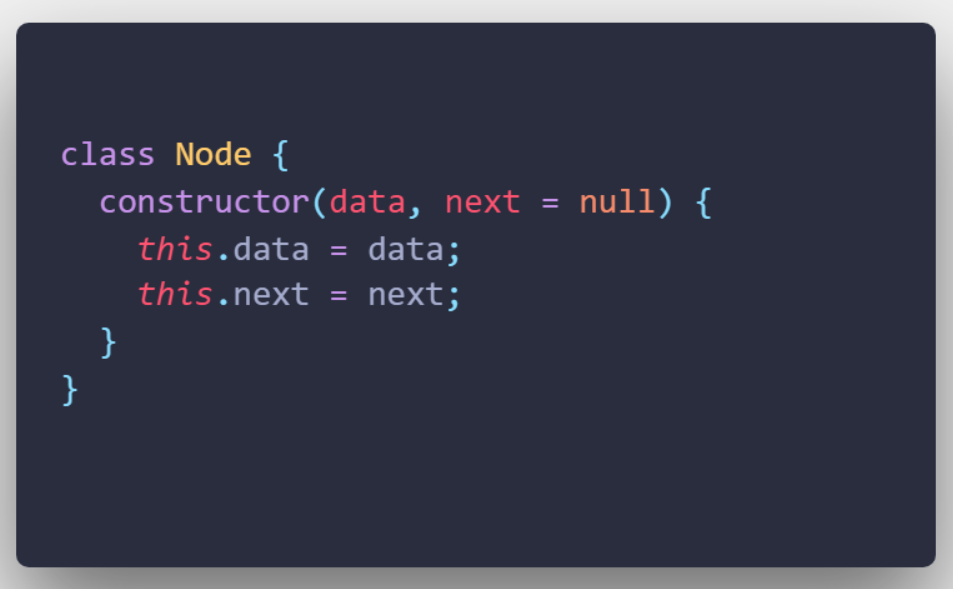
The Node Class
In the next code, we’re going to define our Node class with its constructor. Remember, the node is the basic building block to store the data and the next pointer.
This class will have to handle the node creation. Every time the class is instantiated, the constructor has the responsibility to initialize the two properties: data and next.
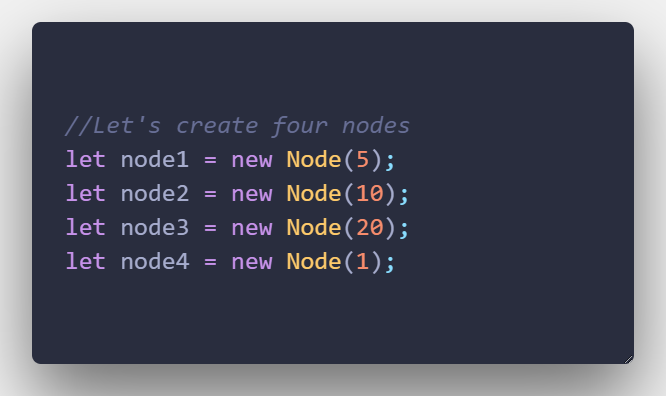
Now the challenge is to create the next four nodes (just nodes creation, not how to connect them).
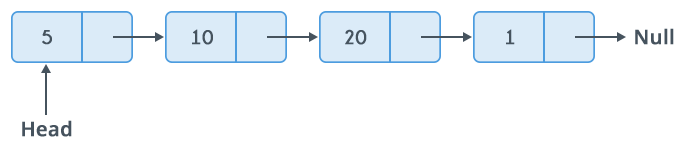
Basically, we have to instantiate the Node class four times in order to create the four nodes.
At this point, we don’t care about the second parameter. Why? Because at this moment, we’re just learning how to create the node without having to worry about how they’ll be connecting together.
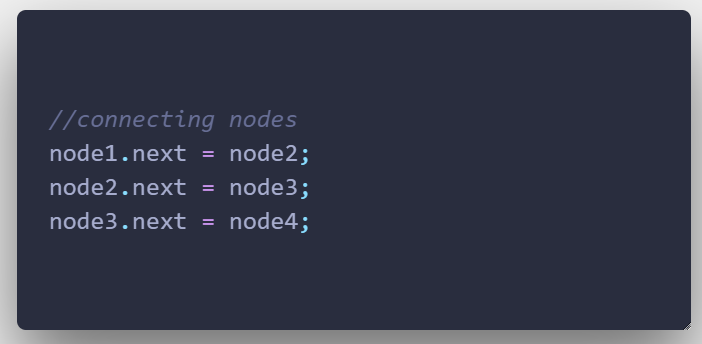
How Can We Connect the Nodes?
In the prior code, we just created nodes independently. Now is time to learn how to connect them to form the linked list.
We have defined the Node class. Next is to define a new class that will handle the nextpointer property and the main operations in the linked list. Let’s create the LinkedList class.
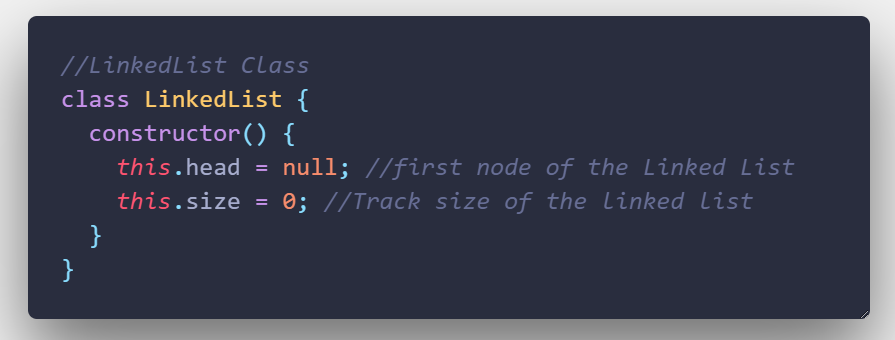
In the above code, we have just defined a class called LinkedList with its constructor. This has the work of initializing the headproperty, to store the first node,and size, to keep track of the size of the linked list.
Next is to offer the ability to insert to the head, to the tail, or at any random position in the list.
Inserting Into the Head
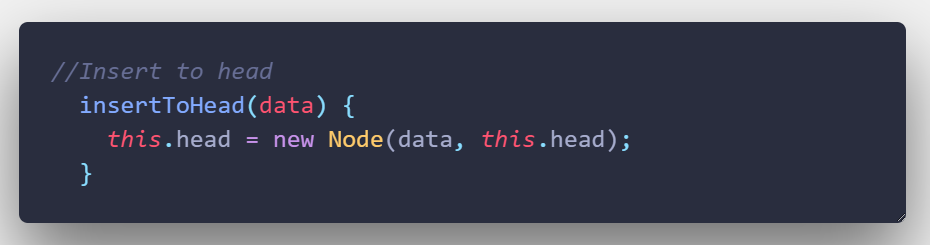
We have just created a simple method to add nodes to the head of the linked list. We are passing down to it the dataparameter and setting a value for the this.head property creating a new instance of the Node class.
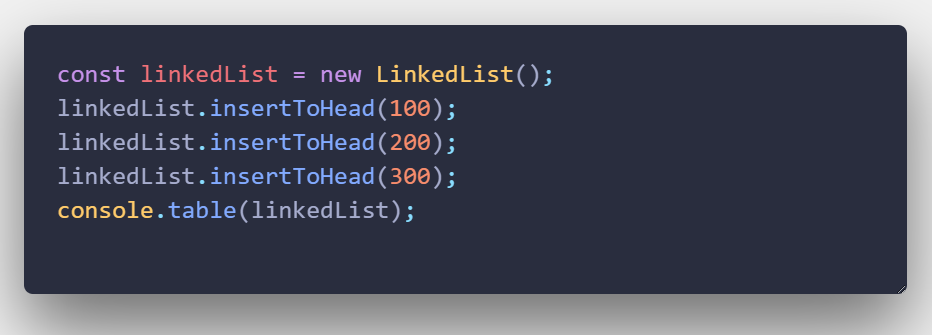
Let’s do some tests of its implementation so far and see the results.
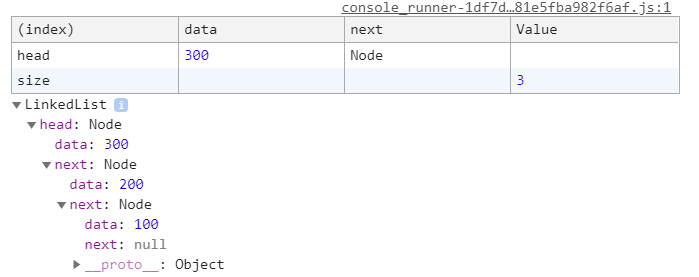
The output will be:
Inserting at the Tail
We just learned how to add nodes to the head. It’s time to know how to add nodes to the tail.
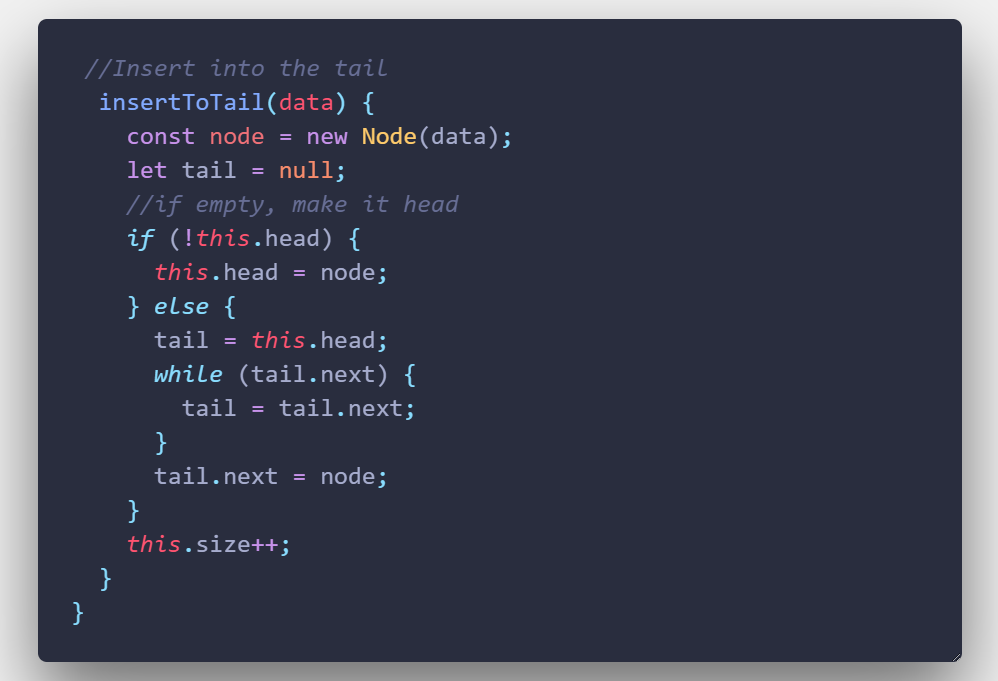
In the aboveinsertToTail function, we are passing down the data parameter, and then we created a new instance of the Node class. After that, we are checking if the head is empty. If so, the head itself will be set to the new node we have just after created. Otherwise, set the tail with the head and then loop through the linked list to find the tail and update the tail’s next pointer.
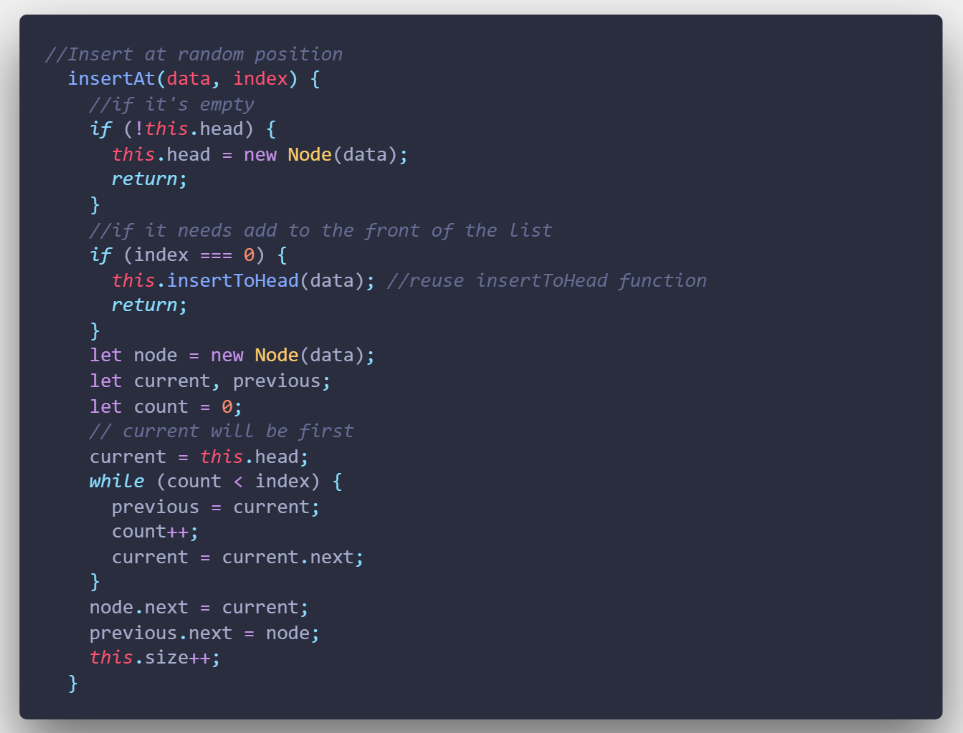
Inserting at Random Position
Finally, we are going to see how to insert a new node in the linked list at a given random position. For this, we have to traverse the list until we find the desired position.
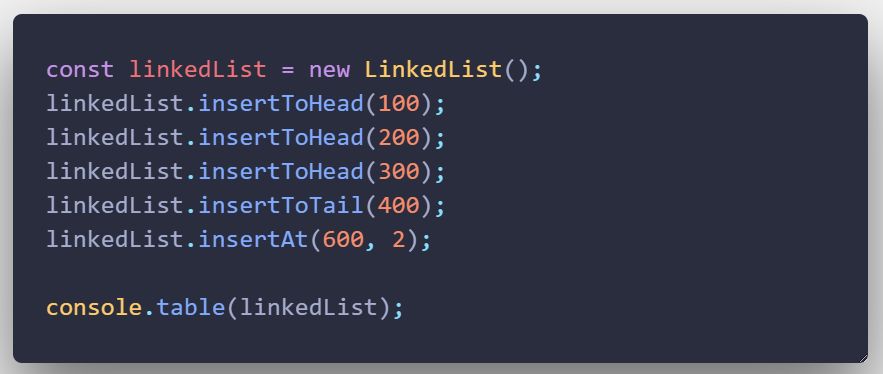
Now we are going to test this function using the next tests.
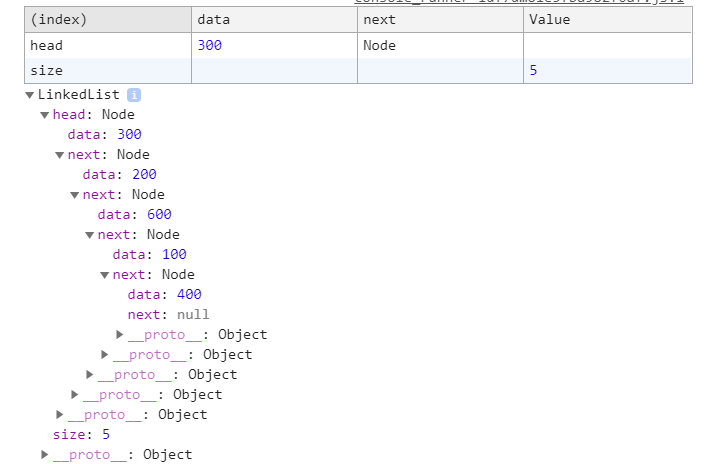
The output will be as below. As you can see, at the given index, the node (600) was added at the second index of the list.
The Whole Code
I hope you have gained more knowledge about data structure, especially with Linked lists. That’s all for now.
Thanks for reading!